Install Stable Diffusion with Easy Diffusion
Installation
System Requirements
- Windows 10/11, Linux or Mac.
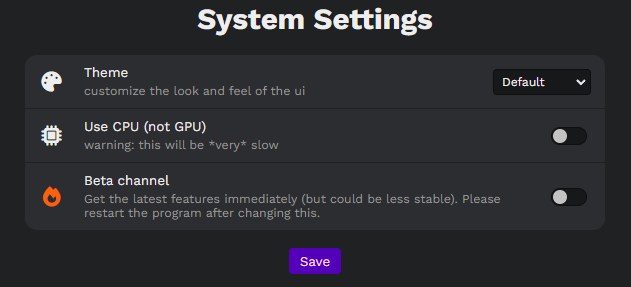
- An NVIDIA graphics card, preferably with 4GB or more of VRAM or an M1 or M2 Mac. But if you don’t have a compatible graphics card, you can still use it with a “Use CPU” setting. It’ll be very slow, but it should still work.
- 8GB of RAM and 20GB of disk space.
You do not need anything else. You do not need WSL, Docker or Conda. The installer will take care of it.
Installation
Windows
- Download for Windows
- Run the downloaded Easy-Diffusion-Windows.exe file.
- Run Easy Diffusion once the installation finishes. You can also start from your Start Menu, or from your desktop (if you created a shortcut).
This will automatically install Easy Diffusion, set it up, and start the interface. No additional steps are needed.
Linux
- Extract:
- Extract the file with your favourite file manager, or use
unzip Easy-Diffusion-Linux.zipin a terminal. - After extracting the .zip file, please open a terminal, and go to the
easy-diffusiondirectory.
- Extract the file with your favourite file manager, or use
- Run:
- In the terminal, run
./start.sh(orbash start.sh)
- In the terminal, run
This will automatically install Easy Diffusion, set it up, and start the interface. No additional steps are needed.
MacOS
- Extract:
- Extract the file with your favourite file manager, or use
unzip Easy-Diffusion-Mac.zipin a terminal. - After extracting the .zip file, please open a terminal, and go to the
easy-diffusiondirectory.
- Extract the file with your favourite file manager, or use
- Run:
- In the terminal, run
./start.sh(orbash start.sh)
- In the terminal, run
This will automatically install Easy Diffusion, set it up, and start the interface. No additional steps are needed.
Uninstall
Just delete the easy-diffusion folder to uninstall all the downloaded packages.
Updates
The software updates itself every time you start it. By default, it will update to the latest stable version. If you want to test out new features, you can switch to the beta chanel in the system settings: 
